Onlayn 2023 İkili Opsiyon Ticarəti ilə Necə Uğur qazanmaq olar
Binaryoptions.com onlayn ticarətdə 10 ildən çox təcrübə ilə ticarət haqqında ən yaxşı təhsili verir, biz sizə kömək edəcəyik:
- Ticarət siqnalları və robotlarda saxtakarlığın qarşısını almaq
- Strategiyalar
- Başlayanlar üçün təlimatlar
- Mütəxəssislərdən ticarət bilikləri
- Ticarət üçün ən yaxşı brokerlər
- Ticarət platforması rəyləri və məsləhətləri
İkili Seçimlər nədir? – Tərif
İkili Opsiyon, nəticənin iki fərqli varianta əsaslandığı “Hər şey və ya Heç nə” seçimi kimi tanınan maliyyə məhsuludur. Yüksək gəlir qazana və ya investisiya məbləğinizi itirə bilərsiniz. Bu sadə “bəli və ya yox” variantıdır, buna görə də “ikili” adlanır.
Siz təklif edirsiniz ki, birjada cari qiymət qalxacaq və ya bir müddət ərzində aşağı düşəcək. Müəyyən bir müddətdə haqlısınızsa, broker tərəfindən müəyyən edilmiş pul məbləği qazanırsınız. Treyder broker platformasında vaxt çərçivəsini (keçmə vaxtı) seçə bilər. 30 saniyədən 2 aya qədər və ya daha çox müddətə opsion ticarət etmək mümkündür. Yalnız istifadə müddəti başa çatdıqda qiymətin tətil qiymətinizdən yüksək və ya aşağı olması vacibdir.
Əsas faktlar:
- İkili Seçim yalnız qalib və ya uduz nəticəsinə malikdir.
- Treyderlər brokerin təklifindən asılı olaraq yüksək gəlir əldə edə bilərlər.
- İkili Seçim müəyyən edilmiş müddət bitdikdən sonra başa çatır və nəticəni dərhal sonra göstərir.
- Bütün investisiya məbləğinə görə risk məhduddur.
- İkili opsionlar ABŞ-da tənzimlənir, lakin digər ölkələrdə əsasən ofşorda satılır.
İkili Seçimlərin funksionallığını burada sınayın:
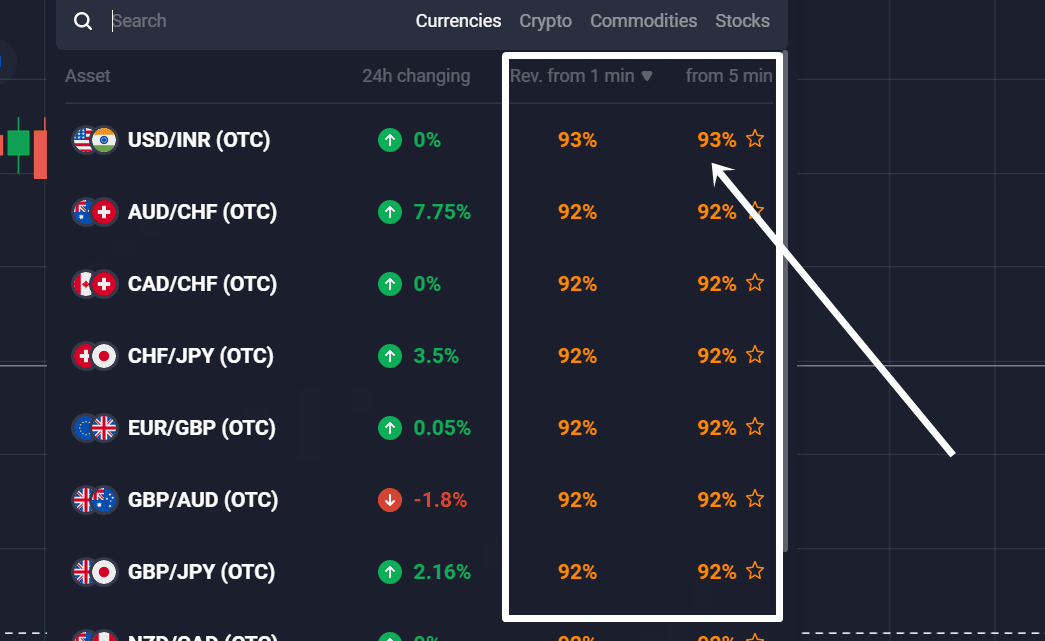
İkili Seçimlər müxtəlif treyderlər arasında sifarişlərə uyğun gələn OTC (birjadankənar) Brokerlər tərəfindən təklif olunur.
İnvestisiya məbləği $1 qədər az və ya $1,000 qədər yüksək ola bilər. Bu, ticarət etdiyiniz platformadan asılıdır.
İkili ticarətdə başlanğıc olsanız belə, pulsuz demo hesabı ilə başlamaq tövsiyə olunur. Bu o deməkdir ki, siz virtual pulla ticarət edirsiniz və bazarlarda heç bir real pula risk etmirsiniz.
Ticarət nümunəsi:
Ticarətə başlamaq üçün bu addımları yerinə yetirməlisiniz:
- Ticarət etmək istədiyiniz aktivi seçin
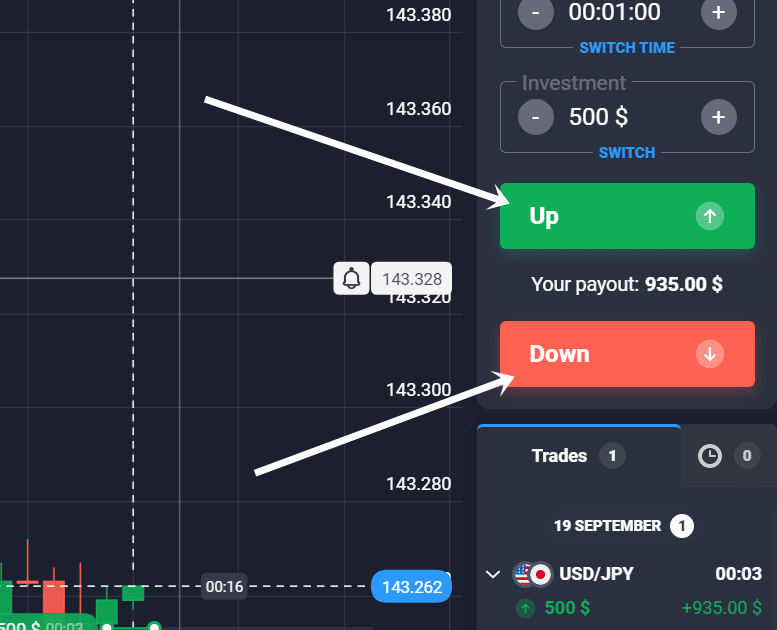
- Gələcək qiymət hərəkəti ilə bağlı proqnoz verin (yuxarı və ya aşağı)
- Seçim müddətinin bitmə müddətini seçin
- Ticarət üçün investisiya məbləğini seçin ($1-dən başlayır)
- Ticarətə başlayın və tətil qiymətində bazara daxil olun.
- İstifadə müddəti bitənə və ikili seçim bitənə qədər gözləyin
- Qiymət tətil qiymətinizdən yuxarı və ya aşağı olmalıdır (ticarət istiqamətindən asılı olaraq)
- 100%-ə qədər mənfəət əldə edin və ya investisiya məbləğinizi itirin
Üstəlik, oxuyun ticarət haqqında tam bələdçi!
Haqqımızda – Binaryoptions.com
İkili Seçimlər a kimi görünür yüksək riskli investisiya yeni başlayanlar və hətta peşəkar treyderlər tərəfindən yaxşı tanınır. Bu, mənfəət və ya zərər qazanmaq üçün bazarlarda mərc oynamağın bir formasıdır.
10 ildən artıqdır ki, biz bu maliyyə aləti ilə ticarət edirik və onu sevirik, çünki bu, qısa müddətdə pul qazanmağın çox yaxşı bir yoludur. Maliyyə məhsulunun qurulması bizə imkan verir xüsusi strategiyalardan istifadə etmək, saytımızda sizə göstərdiyimiz.
Biz ictimaiyyətə daha çox müvəffəqiyyətlə ticarət etməyi başa düşməyə kömək etmək istəyən təcrübəli treyderlər, analitiklər və məzmun yazarlarıyıq. İnternetdə bu haqda çoxlu yalan və yalan xəbərlər var. Səhifəmizlə binar opsion ticarətində itkilərə, fırıldaqlara və yalan məlumatlara “YOX” demək istəyirik.
Keçmişdəki təcrübələrimizdən və səhvlərimizdən daha çox öyrənin. İkili ticarətdə daha çox uğur qazanmağı sizə şəffaf şəkildə göstərəcəyik.

Niyə bizə etibar edə bilərsiniz
Oxucularımızın dəqiq məlumat və ən yaxşı bilik əldə etməsinə necə əmin ola bilərik? – Redaksiya heyətimizlə ciddi şəkildə işləyirik redaksiya qaydaları. Bütün dərc edilmiş məqalələrimiz iki dəfə yoxlanılır və real ticarət mütəxəssisləri tərəfindən sübut edilmişdir. Brokerləri nəzərdən keçirmək və müqayisə etmək üçün biz bizim nəzərdən keçirmə metodologiyası. Platformalar eyni meyarlarla yoxlanılır, bu da oxucularımız üçün təhlükəsiz ticarət təcrübəsinə malik olmaq üçün vacibdir.
Biz yalnız etibarlı brendlərlə işləyirik sənayedə uzun illərdir. Brokerlər real bazar şəraitində pulumuzla sınaqdan keçirilir. Bununla belə, biz 100% fırıldaqlarının qarşısını ala bilmirik, lakin bizim etibar xalımız sizə əmin ola bilər. Etibarlılıq və təhlükəsizlik xüsusiyyətləri üçün hər bir brokeri nəzərdən keçiririk. Bundan əlavə, oxucularımıza ən yaxşı təklifləri tövsiyə etdiyimizə əmin olmaq üçün onların tənzimləyicilərini və rəsmi şirkət təfərrüatlarını yoxlayırıq.
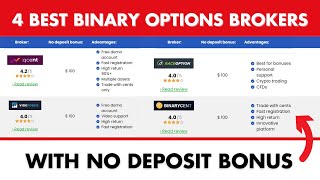
Ən yüksək reytinqli brokerlər – burada ticarətə başlayın:
The Ikili Opsiyonlar brokeri treyder və maliyyə bazarları arasında vasitəçidir. Bu platformalar müxtəlif bazarlarda qısa və ya uzun müddətə getməyə imkan verir. Onlardan bəziləri ticarət üçün 100 aktiv təklif edir; digərləri ticarət üçün 500-dən çox aktiv təklif edir.
İnternetdə çox sayda broker və platforma var; binaryoptions.com-də ən yaxşıları bir-birimizlə müqayisə etdik. Onlar sizə kiçik minimum $ 10 əmanət və minimum ticarət məbləği $ 1 ilə ticarətə başlamağa imkan verir. Maksimum mənfəət məhdudlaşdırılmır.
100+ Bazar
- Beynəlxalq müştəriləri qəbul edir
- Yüksək ödənişlər 95%+
- Peşəkar platforma
- Sürətli depozitlər
- Sosial Ticarət
- Pulsuz bonuslar
100+ Bazar
- Min. depozit $10
- $10,000 demo
- Peşəkar platforma
- 95%-ə qədər yüksək mənfəət
- Sürətli çəkilmələr
- Siqnallar
300+ Bazar
- $10 minimum depozit
- Pulsuz demo hesabı
- 100%-ə qədər yüksək gəlir (düzgün proqnoz olduqda)
- Platformadan istifadə etmək asandır
- 24/7 dəstək
(Risk xəbərdarlığı: Kapitalınız risk altında ola bilər)
100+ Bazar
- Beynəlxalq müştəriləri qəbul edir
- Yüksək ödənişlər 95%+
- Peşəkar platforma
- Sürətli depozitlər
- Sosial Ticarət
- Pulsuz bonuslar
-dan $50
(Risk xəbərdarlığı: Ticarət risklidir)
100+ Bazar
- Min. depozit $10
- $10,000 demo
- Peşəkar platforma
- 95%-ə qədər yüksək mənfəət
- Sürətli çəkilmələr
- Siqnallar
-dan $10
(Risk xəbərdarlığı: Ticarət risklidir)
300+ Bazar
- $10 minimum depozit
- Pulsuz demo hesabı
- 100%-ə qədər yüksək gəlir (düzgün proqnoz olduqda)
- Platformadan istifadə etmək asandır
- 24/7 dəstək
-dan $10
(Risk xəbərdarlığı: Kapitalınız risk altında ola bilər)
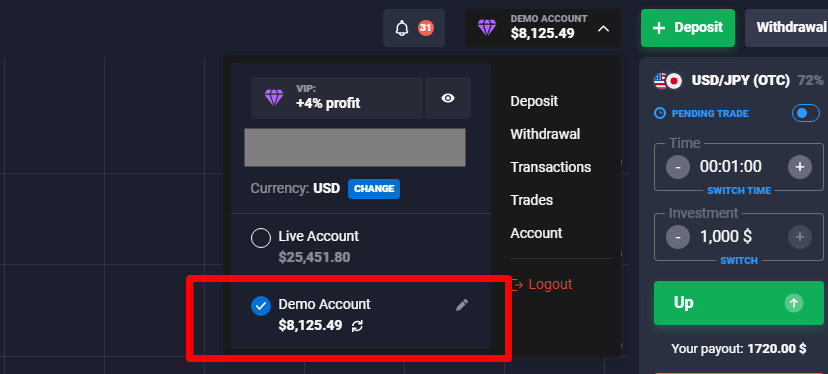
Başlamazdan əvvəl demo hesabını sınayın
A demo hesabı virtual pul ilə xüsusi ticarət hesabıdır. Bu o deməkdir ki, hesab balansı real pulla doldurulmur. Bütün virtual vəsaitlər öz pulunuz üçün risk etmədən itirilə bilər. Bu hesab ikili sistemlərlə ticarətə başlamaq üçün ən yaxşı seçimdir. Demo hesabı ilə başlamağı və əvvəlcə öz pulunuzu riskə atmamağı tövsiyə edirik. İkili ticarət bəzən çox asan görünür, lakin həqiqət budur ki, əksər treyderlər pullarını itirirlər.
Təcrübə qazanmaq, ticarət strategiyasını inkişaf etdirin, müxtəlif bazarlar haqqında daha çox məlumat əldə edin və ticarət platformaları haqqında məlumat əldə edin, ilk növbədə təhlükəsizliyiniz üçün demo hesabından istifadə etməlisiniz. Əgər özünüzü rahat hiss edirsinizsə və virtual pulla müəyyən qazanc əldə etmisinizsə, real hesablarla ticarətə başlaya bilərsiniz.
(Risk xəbərdarlığı: Kapitalınız risk altında ola bilər)
Ən vacib şərtlər:
Bir başlanğıc kimi Binary Options-ı ilk 5 dəqiqədə başa düşmək asan deyil. Bu vacib şərtləri oxumaq və onları anlamaq üçün kifayət qədər vaxtınız olduğundan əmin olun. Uğurunuz üçün əsas səviyyədir. Maliyyə məhsulunu və onun xüsusiyyətlərini başa düşmürsinizsə, bütün pulunuzu itirə bilərsiniz. Növbəti hissədə sizə ən vacib şərtləri göstərəcəyik və onları sizə izah edəcəyik.
- Əsas Aktiv – Bu, ikili ticarət etdiyiniz bazardır.
- İstifadə müddəti – Ticarət müddəti bitdikdə yekun nəticəni alacaqsınız.
- Tətil Qiyməti – Almağa və ya satmağa başladığınız qiymətiniz. Qazanc əldə etmək üçün qiymət yuxarıda və ya aşağıda olmalıdır.
- Sabit mənfəət məbləği – Ticarətdən çıxa biləcəyiniz mümkün gəlir
- Zəng seçimi – Siz yüksələn qiymətlərə investisiya edirsiniz
- Variant qoyun – Siz qiymətlərin enməsinə sərmayə qoyursunuz
İkili opsionun əsas aktivi

Əsas bazar səhmlər, əmtəələr, kriptovalyutalar, forex və ya ETF-lər ola bilər. Hansı aktivlərin təklif olunduğu brokerdən asılıdır. Ticarət yalnız bu əsas aktivlər üzrə opsion müqaviləsini alır və ya satır. Bu, pərakəndə satıcıdan qızıl almaq kimi aktivə real investisiya deyil. Siz sadəcə opsion müqavilələri ilə ticarət edirsiniz.
Opsionun bitmə vaxtı

İkili seçim həmişə sabit bir müddət ərzində bağlanır. Məsələn, 30 saniyə, 60 saniyə və ya hətta 1 aylıq ticarət edə bilərsiniz. Bu, seçdiyiniz brokerdən və hansı son istifadə tarixlərinin mövcudluğundan asılıdır. İstifadə müddəti başa çatdıqda, əsas aktivin qiyməti qiymət hədəfinizdən yuxarı və ya aşağıda olmalıdır.
Qiymət hədəfi/tətil qiyməti
Qiymət hədəfi əsas giriş nöqtəniz və ya tətil qiymətinizdir. İkili opsionu almağa və ya satmağa başlasanız, tətil qiyməti cari bazar qiymətidir. Buna görə də sizin tərəfinizdə yaxşı vaxt olması çox vacibdir. Qiymət hədəfinizi 0,1 punkt ilə qaçırsanız belə, bütün investisiyanızı itirə bilərsiniz. Ancaq digər tərəfdən, əgər haqlısınızsa, yüksək məbləğdə gəlir əldə edə bilərsiniz. Bəlkə soruşursunuz: İki qiymət hədəfim ola bilərmi? - Cavab sadədir: bu mümkün deyil.
Sabit mənfəət məbləği
İkili opsion, broker tərəfindən müəyyən edilmiş sabit bir mənfəət məbləğinə malikdir. Sabit ödəniş investisiya məbləğinizin 60%, 70% və ya hətta 90% ola bilər. Ancaq unutmayın ki, səhv ticarət qərarları qəbul etsəniz, bütün investisiyalarınızı itirə bilərsiniz. Yalnız iki nəticə var: itirirsən və ya qalib gəlirsən. Sabit ödəniş də ticarət etdiyiniz əsas bazardan və son istifadə müddətindən asılıdır. Bəzən ikili opsion ticarətinin üç növ nəticəsi var: Siz itirirsiniz, udursunuz və ya bazar tam olaraq tətil qiymətinə çatdıqda pulu geri alırsınız.
Zəng və put opsionu
Binary Options məhdud riski olan sadə ticarət məhsuludur. Onun ticarətinin yalnız iki yolu var: Siz zəng və put opsionlarınız var. Zəng seçimi o deməkdir ki, ikili opsion bazarı məhdud müddət ərzində müəyyən bir qiymətdən yuxarı qalxacaq. Put opsionu, məhdud müddət ərzində bazarın müəyyən bir qiymətdən aşağı düşəcəyini söylədiyiniz deməkdir.
Mənfəəti hesablamaq üçün daxili alətimiz olan mənfəət kalkulyatorundan istifadə edə bilərsiniz:
Aşağıdakı alətdən istifadə edərək, ikili seçim ticarətində mənfəət və ya zərəri hesablayırsınız. İnvestisiya məbləğlərini, brokerin qaytarmasını və itirilən və qazanan hərracların məbləğini daxil edin. Sonra ticarətinizin ümumi nəticəsini görürsünüz. Ətraflı məlumat üçün bizimlə əlaqə saxlaya bilərsiniz mənfəət kalkulyatoru səhifəsi.
(Risk xəbərdarlığı: Kapitalınız risk altında ola bilər)
İkili seçimlərin üstünlükləri və çatışmazlıqları:
Üstünlüklər:
- Riskləri məhdudlaşdırın
- Yüksək mənfəət mövcuddur
- Qısamüddətli və uzunmüddətli ticarət
- Anlamaq asan
- Peşəkar platformalar mövcuddur
- Hedcinq üçün istifadə edilə bilər
- İstənilən maliyyə bazarında istifadə edilə bilər
Dezavantajları:
- Asılılıq yarada bilər
- Orada bəzi pis brokerlər var
- Hər ölkədə mövcud deyil
(Risk xəbərdarlığı: Kapitalınız risk altında ola bilər)
Binary Options qanunidir, yoxsa yox?
Bir çox treyderlər bunu soruşurlar İkili Seçimlər qanuni və ya qanuni deyil. Tənzimlənən və təhlükəsiz onlayn ticarət haqqında danışarkən bu sual lazımdır. Əvvəllər sənayedə çoxlu fırıldaqçılar var idi. Bir çox tənzimləyicilər bu məsələlərlə bağlı xəbərdarlıq etdilər və maliyyə məhsulunu daha da tənzimləməyə başladılar. Hal-hazırda bir orqan tərəfindən tənzimləyici nəzarəti olan bir ticarət platformasından istifadə etmək vacibdir.
İkili Seçimlər 99% ölkələrində ticarət üçün tam qanunidir. Pərakəndə investorlar üçün bəzi istisnalar var:
- Avropa Birliyi: Onların pərakəndə ticarətçilərə satılmasına icazə verilmir
- Kanada: Tamamilə qadağandır
- İsrail: Tamamilə qadağandır
- Avstraliya: Pərakəndə ticarətçilərə icazə verilmir
İkili opsionlar ticarət üçün qanunidir:
Maliyyə məhsulu investorlar və pərakəndə treyderlər üçün ticarət üçün qanunidir. Hətta peşəkar treyderlər Binary Options ilə ticarət edə bilərlər. Treyder sadəcə uyğun bir brokerlə qeydiyyatdan keçə və ikili ticarətə başlaya bilər. Brokerlərin bəziləri tənzimlənmir. Buna görə diqqətli olmalısınız və orada ticarət edə biləcəyinizi tənzimləyicinizlə yoxlayın. Çox vaxt ticarət hesabı açmaq qanunidir.
Avropada qadağandır?
Avropa Birliyində ikili seçim xidmətlərini yalnız peşəkar treyderlərə satmağa icazə verilir. Bu o deməkdir ki, Avropadakı brokerlər yalnız peşəkar treyderləri qəbul edə bilər. Peşəkar treyder olmaq üçün sizə 500.000 avrodan çox, yüksək ticarət həcmi və ya maliyyə təhsili lazımdır. Bu nöqtələrdən 2-nə müraciət etsəniz, Avropada peşəkar treyder kimi ticarət edə bilərsiniz. Üstəlik, Avropadan kənarda bir broker ilə ticarət edə bilərsiniz, lakin bu tənzimlənmir. Əksər platformalar ilə əlaqəli idi Kipr tənzimləyicisi CySEC 2010-2018-ci illərdə.
ABŞ-da qanunidirmi?
Binary Options Amerika Birləşmiş Ştatlarında rəsmi maliyyə məhsuludur. Amerika vətəndaşlarına ticarət etməyə icazə verilir, lakin o, ABŞ-da ABŞ-ın tənzimləyici orqanı tərəfindən yoxlanılan tənzimlənən brokerdə olmalıdır. CFTC (əmtəə fyuçerslərinin ticarət komissiyası).

Ancaq tənzimlənməyən brokerlərə diqqət yetirin. The FINRA (Maliyyə Sənayesi Tənzimləmə Təşkilatı) artıq ABŞ treyderlərinə xidmətlər təklif edən tənzimlənməmiş qurumlar barədə xəbərdarlıq edib. Brokerinizin statusu haqqında məlumatınız yoxdursa, sadəcə olaraq FINRA-nın broker çekindən istifadə edə bilərsiniz: https://brokercheck.finra.org/
ABŞ-da ən vacib tənzimləyicilər:
- CFTC - Əmtəə Fyuçers Ticarət Komissiyası
- FINRA - Əmtəə Fyuçers Ticarət Komissiyası
- SEC - Qiymətli Kağızlar və Birja Komissiyası
- NFA - Milli Futures Assosiasiyası
Ticarət Binary Options vasitəsilə ABŞ-da mövcuddur Şimali Amerika törəmələri birjası (NADEX). Bu tənzimlənən ticarət platformalarından biridir. Orada bir neçə kliklə ala və ya sata bilərsiniz.
İkili Seçimlərin Qaydaları
İndiki vaxtda yalnız bir var bir neçə tənzimlənən Binary Options brokeri. Onların əksəriyyəti nizamlanmayandır. Müxtəlif ölkələrdə fərqli qaydalar var. Bir brokerlə qeydiyyatdan keçməzdən əvvəl ölkənizdəki tənzimləmə statusunu yoxlamalısınız. Təcrübəmizə əsasən, əksər brokerlər 90% ölkələrindən müştəriləri qəbul edirlər. Brokerin ölkənizdə işlədiyini də brokerin saytında yoxlaya bilərsiniz. Bir çox broker, ölkələrində ticarət etməyə icazə verilmədiyi təqdirdə müştəriləri bloklayır.
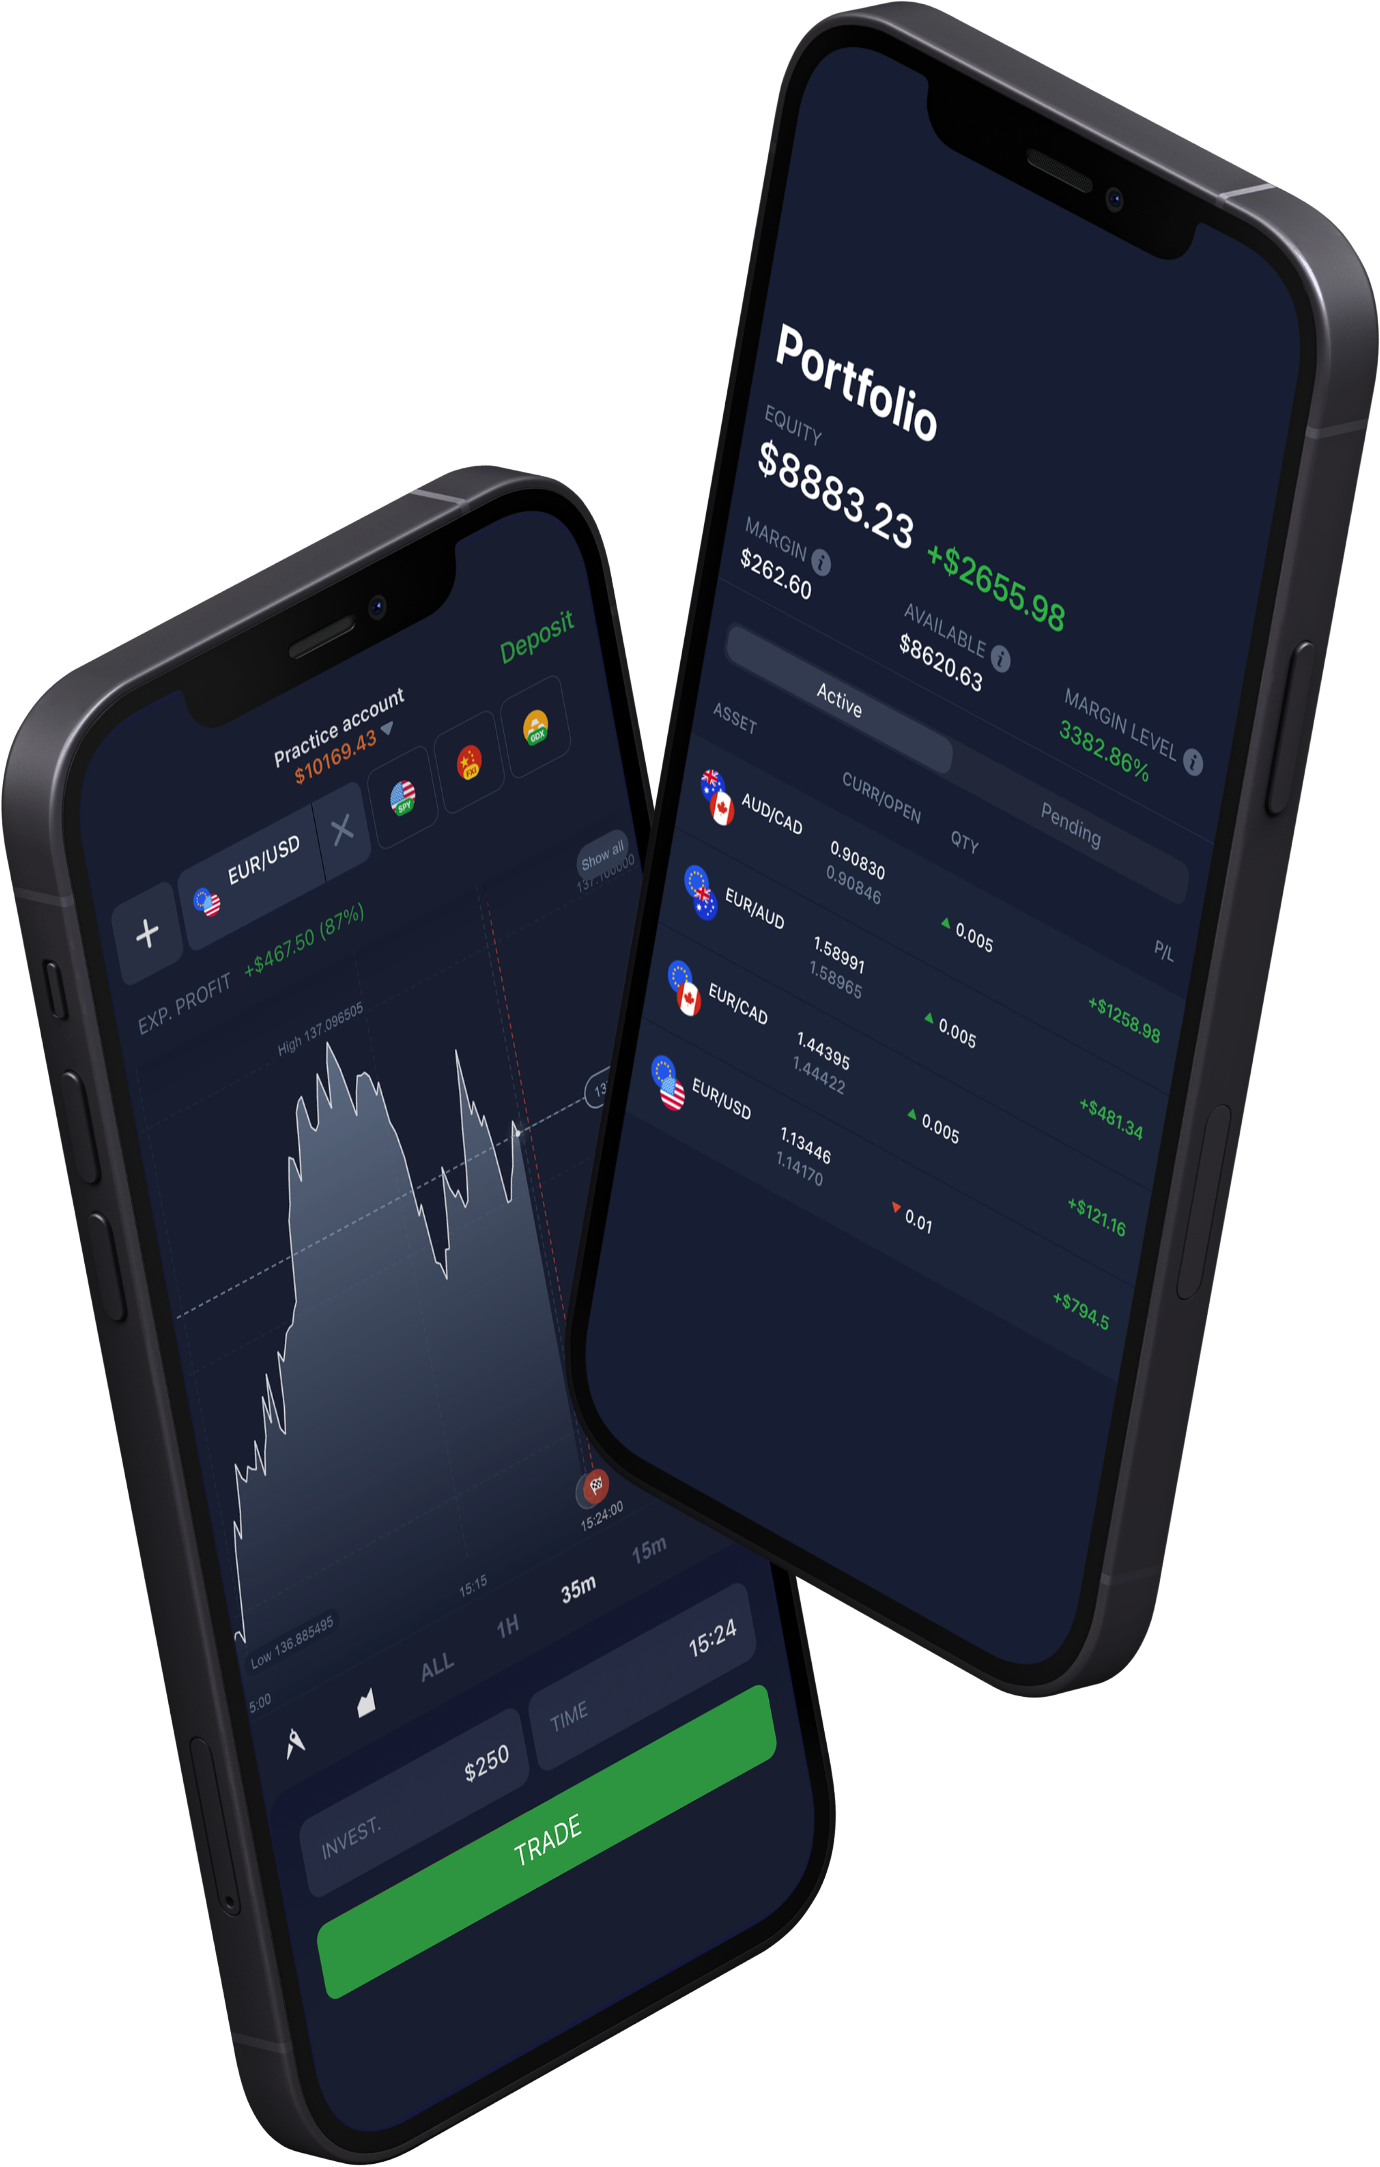
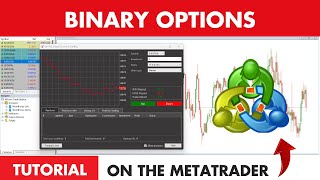
Binary Options ticarət platformaları və brokerləri
Binary Options ticarətinə başlasanız, bir çox internet əsaslı ticarət platformaları tapa bilərsiniz. Bəs investisiyalarınız üçün hansını seçməlisiniz? Broker sizə əsas aktivlərə əsaslanan maliyyə alətləri ilə ticarət etməyi təklif edir. Broker maliyyə bazarları ilə treyder arasında vasitəçidir. Pərakəndə treyderlər üçün ticarət proqramları, ticarət platformaları, proqram təminatı və canlı qrafiklər təklif olunur.
Aşağıdakı əsas məqamlar sizin üçün ən uyğun brokeri seçməyə kömək edəcək. Binary Options ticarət şirkəti seçməzdən əvvəl bu sualları verin:
- Ticarət platforması tənzimlənirmi?
- Ticarət platforması mənim ölkəmdə qanunidirmi?
- Broker mənim ölkəmdə xidmətlərini təklif edirmi?
- Ticarət tətbiqini sınamaq üçün virtual ikili hesabdan istifadə edə bilərəmmi?
- Minimum əmanət nə qədər yüksəkdir
- Gizli ödənişlər varmı?
- Depozitlər və pul çıxarmaq üçün komissiyalar nə qədər yüksəkdir?
- Ticarət proqramı mənim təhlilimə uyğundurmu?
- Ticarət üçün nə qədər aktiv var?
- Əsas ticarət dövrlərində investisiya gəliri nə qədər yüksəkdir?
- Broker real vaxt dəstəyi təklif edirmi?
Gördüyünüz kimi, bir broker seçməzdən əvvəl soruşulacaq bir çox sual var. Bizim Binary Options broker müqayisəmizdə, sizə tövsiyələrimizi göstərəcəyik.
İkili brokerlərin fırıldaq üsulları hansılardır?
Saxta ikili seçim ticarət firması heç bir tənzimləmə tələblərinə uyğun gəlmir. Bu, tənzimlənməmiş ticarət platformalarının pis olması demək deyil, lakin çox vaxt onlarla ticarətə başlamaq çox risklidir. İnvestisiya səyahətinizə başlasanız və şirkətlər tərəfindən aldadılsanız, aşağıdakı üsullar geniş yayılmışdır:
- Müraciətləri rədd edin: Broker ticarət açmaq və ya bağlamaq tələbinizi rədd edir. Bu uçucu ikili seçim bazarlarında çox ağrılı ola bilər.
- Vəsaitlərin qaytarılması yoxdur: The ikili fırıldaqçı broker pulu bank hesabınıza və ya ödəniş üsullarınıza qaytarmır.
- Manipulyasiya edilmiş real vaxt qrafikləri: Fırıldaqçı broker sizə ticarətlər üçün ən yaxşı qrafiklərə və icraata malik olduğunu deyir, lakin o, manipulyasiya edilir.
- Saxta hesab menecerləri: Brokerlər sizə pul qazanmağınıza kömək edə biləcək bir mütəxəssis komandası olduğunu söyləyəcəklər. Bütün bu insanlar yalnız pulunuzu istəyir və investisiyalarınız üçün yaxşı məsləhətləri yoxdur.
- Gizli ödənişlər: Broker, məsələn, pul çıxarmaq istəyərkən sizdən böyük məbləğdə komissiyalar tələb edəcək.
- Manipulyasiya edilmiş ticarət: İkili broker sizin qazanan hərraclarınızı manipulyasiya edəcək və onları itirən hərraclara çevirəcək.
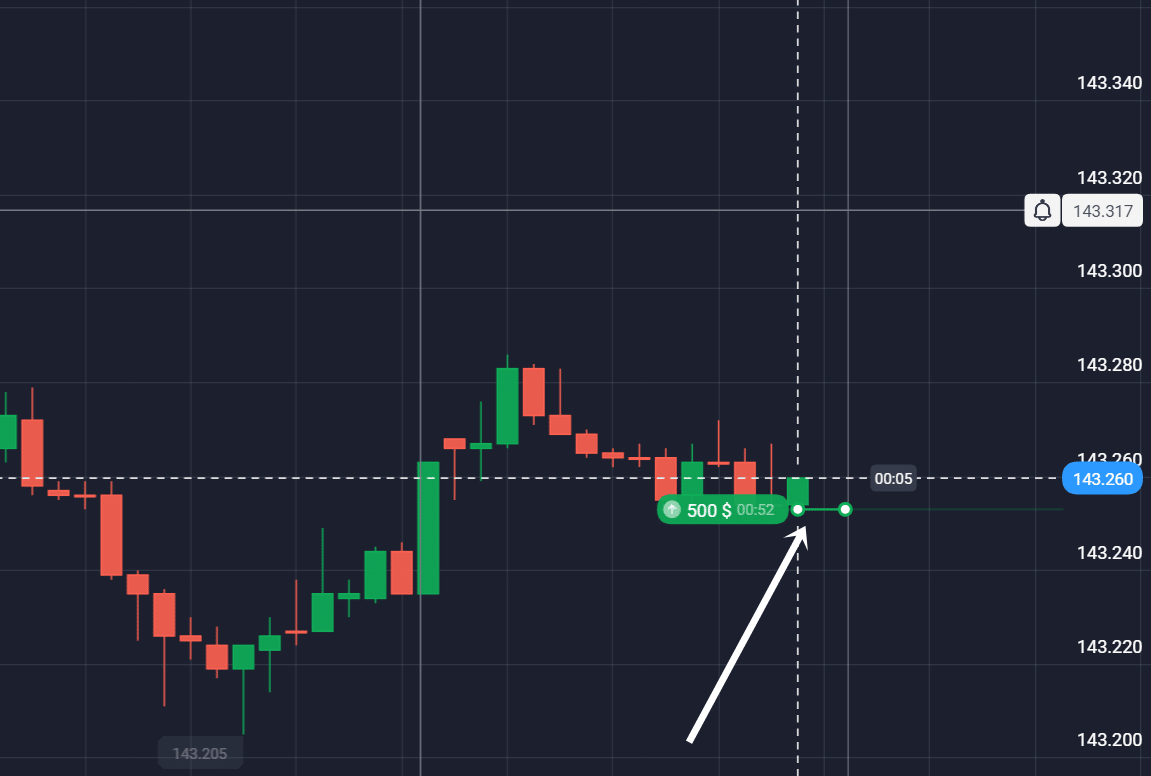
Uğurunuz üçün təkrarlanan strategiya yaradın
Peşəkar treyderdən bazarda necə ticarət etdiyini soruşsanız, o sizə bazara girmək və çıxmaq üçün qaydalara və strategiyaya əməl etdiyini söyləyəcək. Uzunmüddətli perspektivdə pul qazanmaq üçün Binary Options strategiyası lazımdır. Bəli, yalnız bazarda şanslı olmaqla plansız qazanclı ticarət edə bilərsiniz, lakin uzun müddətdə sizə işləyən düzgün strategiya lazımdır!
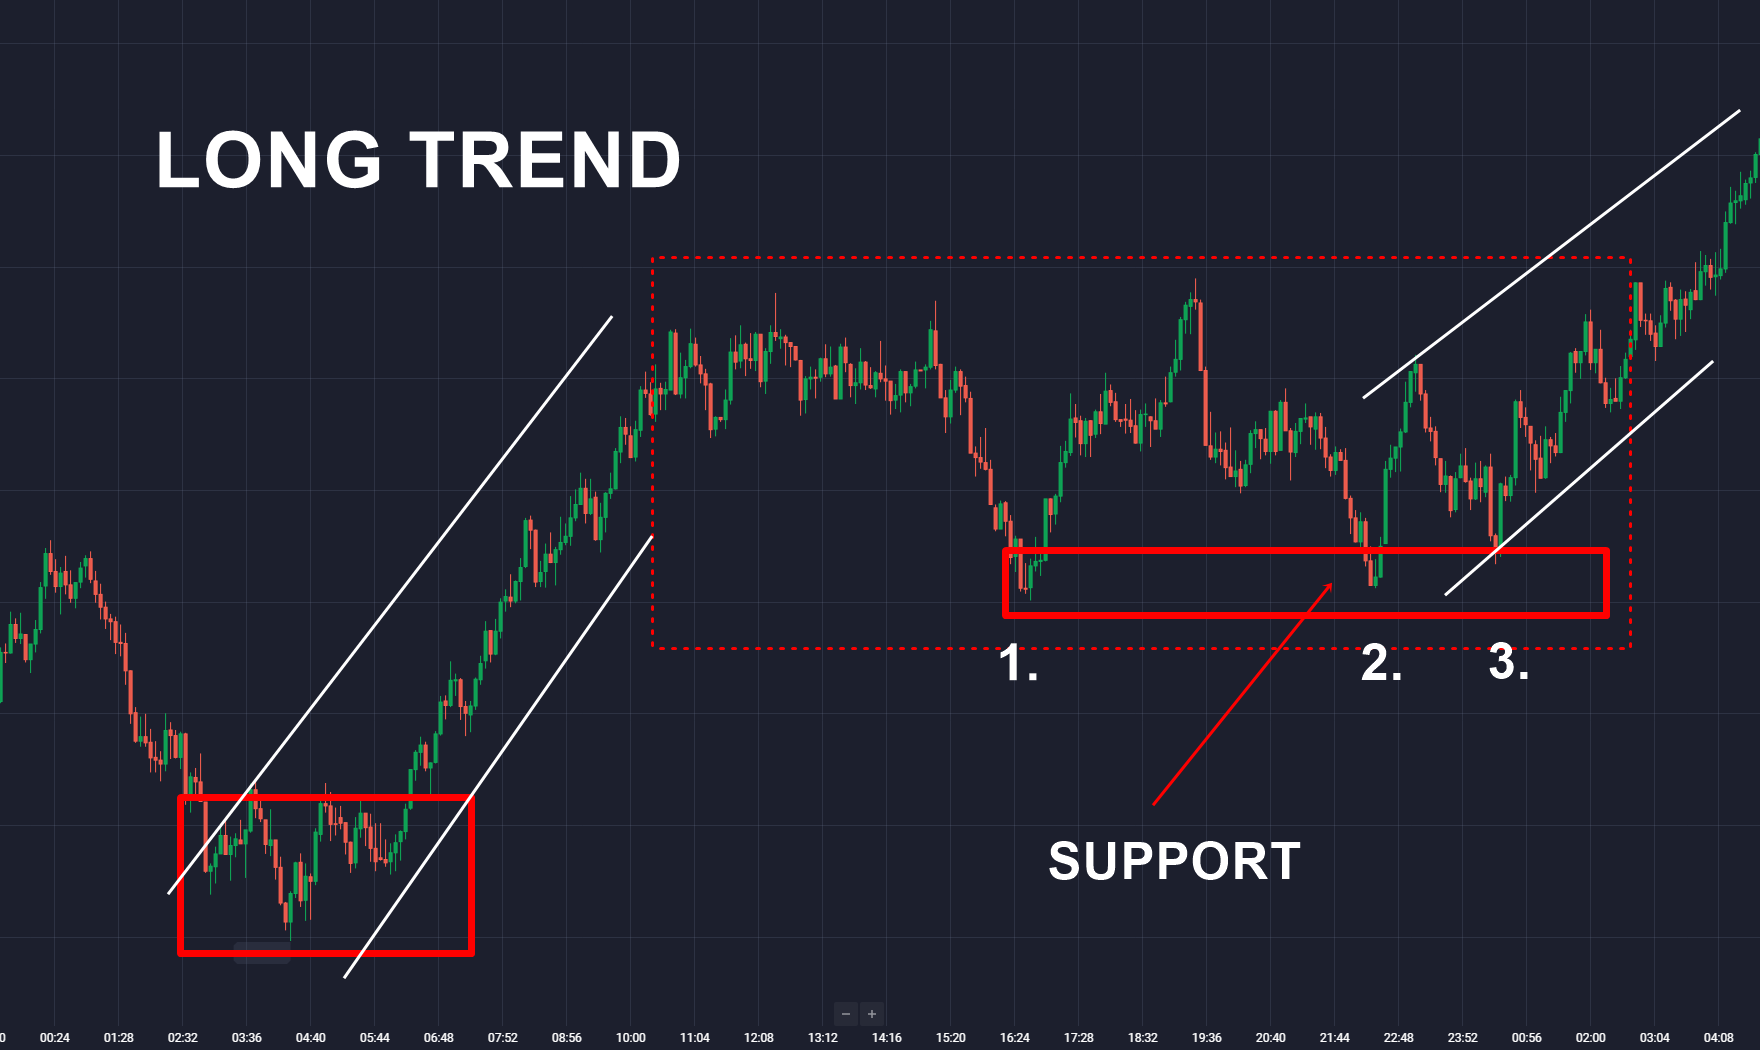
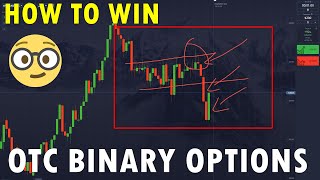
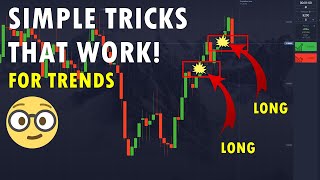
Bazarda işləyən bir çox ticarət strategiyası var; burada ən vacib məqam qayda dəstini maşın kimi icra etməkdir. Çox vaxt treyderlər öz qaydaları ilə ticarət etmirlər, bu da itki ilə nəticələnir. Yuxarıdakı nümunəmizdə görürsünüz ki, biz bazarı qiymət hərəkəti və şamdan qrafiki ilə təhlil etdik. Bazarın qiymətləri yüksəltdiyini açıq şəkildə görürük. Bazar aşağı enişlər etmir, ona görə də biz yalnız trendlə ticarət etmək və burada bəzi uzun mövqelər yaratmaq istəyirik.
Strategiyaya aşağıdakı məqamlar daxil edilməlidir:
- Hazırda bazar haradadır?
- Bazarda son hərəkətlər hansılardır?
- Mən trend və ya diapazon görə bilərəm?
- Ən yüksək və enişlər haradadır?
- Mən ticarətə girmək üçün təsdiq görürəm?
Daha ətraflı məlumat və öyrənmə üçün səhifəmizi ziyarət edin strategiya səhifəsi.
İnvestorlar üçün ən böyük risklər hansılardır?
Daha əvvəl qeyd edildiyi kimi, ikili opsionların ticarəti çox risklidir. Yeni başlayanlar tez-tez treyderlərin bir neçə saniyə ərzində minlərlə dollar qazandıqları youtube videolarından təsirlənirlər. Onların görmədikləri odur ki, youtube və ya başqa platformalarda görünən bu treyderlər təcrübəlidirlər və nə etdiklərini bilirlər. Onların ticarət strategiyalarını kopyalaya bilərsiniz, ancaq bazarda təcrübəniz olmadığı üçün pul qazanmayacaqsınız.
İkili opsionlarla ticarət edərkən bütün investisiya məbləğinizi itirə bilərsiniz. Yeni başlayanların ticarətə başladığını gördükdə bu, ən çox qiymətləndirilməmiş riskdir. Broker saytında 90%+ gəlir əldə edə biləcəyiniz yaxşı səslənir. Ancaq səhv edirsinizsə, 100% itkiniz var. İnvestor üçün ikili seçimlərin risk-mükafat nisbətində həmişə bir dezavantaj var. Beləliklə, daimi pul qazanmaq üçün sizə 55% – 60% və ya hətta 70% qazanan hərraclardan daha çox ehtiyacınız var.
Aşağıdakı cədvələ baxın:
| İkili seçimin orta gəliri: | Pul qazanmaq üçün minimum qazanan hərraclar (bir az üstələyir): | Qazanma dərəcəsi: |
|---|---|---|
| 90% | 100-dən minimum 53 qalib | 53%+ |
| 80% | 100-dən minimum 56 | 56%+ |
| 70% | 100-dən minimum 59 | 59%+ |
| 60% | 100-dən minimum 63 | 63%+ |
Hesablamada gördüyünüz kimi, qalib gəlmək üçün ən azı 53% – 56% nisbətinə ehtiyacınız olacaq (orta gəlir 80% – 90% ilə ölçülür). Daha çox pul qazanmaq üçün ən azı 60% – 70% qazanma dərəcəsi lazımdır. Qaytarmağınıza təsir edən müxtəlif amillər var:
- Əsas aktivin gəlirlilik dərəcəsi
- Ticarətinizin qazanma dərəcəsi
- İkili seçimlər üçün martingale strategiyasından istifadə edirsiniz, yoxsa yox
Martingal sistemlərində və ya ikiqat ikili strategiyalarda yüksək risk
Bir çox yeni başlayanlar a istifadə edir martingal sistemi və ya itkiləri bərpa etmək üçün ikiqat strategiya. İdeya sadədir və qumar səhnəsində öz tarixi var. Bir mərc itirsəniz, sadəcə investisiya məbləğini iki dəfə artırın. Ticarət edərkən, bütün itkiləri bərpa etmək üçün onu ikiqat etməkdən daha çox pul yatırmalısınız. Aşağıdakı hesablamalar nümunələri göstərir:
İkiqat strategiya $ 10.000 hesab ölçüsü və 1% riskin idarə edilməsi ilə. 5 ticarət uduzduqdan sonra hesabınız müflis olur və siz bu strategiyanı davam etdirə bilməzsiniz:
| Hesab ölçüsü: | Ticarət itirmək: | İnvestisiya (2x) | Mənfəət (ortalama 80%): | Xalis mənfəət (qalib olsanız): |
|---|---|---|---|---|
| $ 9,900 | 1. | $ 100 | $ 80 | $ 80 |
| $ 9,700 | 2. | $ 200 | $ 160 | $ 60 |
| $ 9,300 | 3. | $ 400 | $ 320 | $ 20 |
| $ 8,500 | 4. | $ 800 | $ 640 | – $ 60 |
| $ 6,900 | 5. | $ 1600 | $ 1280 | – $ 220 |
| $ 3,700 | 6. | § 3200 | $ 2560 | – $ 540 |
Martingale strategiyası $ 10.000 hesab ölçüsü və 1% riskin idarə edilməsi ilə. 5 ticarəti itirdikdən sonra hesabınız müflis olur və siz bu strategiyanı davam etdirə bilməzsiniz.
| Hesab ölçüsü: | Ticarət itirmək: | İnvestisiya (2,3x) | Mənfəət (ortalama 80%): | Xalis mənfəət (qalib olsanız): |
|---|---|---|---|---|
| $ 9,900 | 1. | $ 100 | $ 80 | $ 80 |
| $ 9,670 | 2. | $ 230 | $ 184 | $ 84 |
| $ 9,141 | 3. | $ 529 | $ 423 | $ 93 |
| $ 7,925 | 4. | $ 1216 | $ 972 | $ 113 |
| $ 5,129 | 5. | $ 2796 | $ 2236 | $ 160 |
| – $ 1,301 | 6. | $ 6430 | $ 2144 | $ 273 |
Bu strategiyalardan istifadə etməyi məsləhət görmürük, çünki ticarət hesabınızı tez bir zamanda öldürə bilərsiniz! Yuxarıda gördüyünüz kimi, ardıcıl olaraq 5 uduzma əməliyyatı edə bilərsiniz və hesab balansınızın yalnız 1% ilə başlasanız belə hesabınız yox olur. Risklərin yaxşı idarə edilməsini öyrənin və peşəkar treyderlər kimi investisiyalar üçün sabit məbləğdən istifadə edin.
Emosiyalar və qumar
Binar ticarətin digər yüksək riski emosiyalar və psixologiyadır. Onlayn ticarət bəzən yeni başlayanlar üçün kazinoya getməyə bənzəyir. Siz qalib gələ bilərsiniz və ya itirə bilərsiniz! Ardıcıl çoxlu pul və ya çoxlu ticarət itirdikdə, treyderlər bütün itkiləri bərpa etmək istədikləri üçün irrasional ticarət qərarları verməyə meyllidirlər. Təcrübəmizdən belə ola bilər ki, yeni başlayan şəxs pulunu belə tez itirdiyinə inana bilmədiyi üçün hesabını öldürməyə başlayır. Tez-tez bir çox ticarət və yüksək həcmdə ticarət edilir. Zərərləri qəbul etməyi öyrənin və ticarət planından istifadə etməyə davam edin!
Pul itirmək riskinə qarşı həll yolu: Ticarət planı
Ticarətlərinizi idarə etdiyiniz ciddi ticarət planı yaradın. Ticarət planından istifadə edərək, aşağıdakı faktları nəzərə almalısınız:
- Pulun idarə edilməsi
- Ticarət girişi
- Ticarət çıxışı
- Ticarətin bitmə vaxtı
- Düzgün investisiya məbləği
- Bazar xəbərlərinə diqqət yetirin
- İkili seçim ticarət strategiyanıza sadiq qalın
Duyğuları azaltmağın ən yaxşı yolu, bir qayda dəstiniz olan bir ticarət planına sahib olmaqdır. Buraya düzgün strategiya da daxildir. Məsələn, 50-ci dövrün SMA və 20-ci dövrün EMA-nın kəsişdiyini və RSI göstəricisinin həddindən artıq satıldığını/həddən artıq satın alındığını deyirsiniz, biz ticarətə başlayırıq və pul yatırırıq. Diaqramda bu quraşdırmanı görməməklə, ticarətə girmirsiniz. Bu sadə bir nümunədir, ona getdikcə daha çox qaydalar əlavə edə bilərsiniz.
Mövzumuza baxış:
Ən çox verilən suallar:
İkili seçimdən nə vaxt istifadə edə bilərsiniz?
İkili Seçimlər yüksək dəyişkənlik və hətta aşağı dəyişkənlik bazarları ilə istifadə edilə bilər. Əksər hallarda Binary Options pul qazanmaq və ya mövcud portfeli hedcinq etmək üçün istifadə olunur. Pərakəndə investorlar tez-tez bu maliyyə məhsulundan qısa müddətdə mənfəət əldə etmək üçün istifadə edirlər. Peşəkar treyderlər bu maliyyə məhsulundan investorun hesabını hedcinq etmək üçün istifadə edirlər.
Binary Options bir fırıldaqdır?
İkili Seçimlər fırıldaqçılıq deyil. Bu, rəsmi olaraq tənzimlənən maliyyə alətidir. Təəssüf ki, tənzimləyici səbəblərə görə bir çox ölkələrdə mövcud deyil. Təcrübəli və yaxşı tanınan bir broker seçməklə, ikili seçimlərlə investisiya etmək üçün sağ tərəfdəsiniz.
Binary Options ticarəti ilə zəngin ola bilərsinizmi?
Bu, “zəngin” olmaq anlayışından asılıdır. Bacararsan Binary Options ticarəti ilə çoxlu pul qazanın, lakin digər tərəfdən, bazarda ticarət etmək çox riskli bir üsuldur. Əksər treyderlər ticarətə girərkən riskləri az qiymətləndirirlər. Pul qazanmaq üçün uyğun ticarət strategiyasına və təcrübəyə ehtiyacınız olacaq.
Binary Options haqqında niyə bu qədər xəbərdarlıq var?
Əvvəllər bu bazarda yeni başlayanların pullarını oğurlamaq üçün saxta veb-saytlardan və ya saxta qiymət cədvəllərindən istifadə edərək çoxlu fırıldaqçılar var idi. Tənzimləmə orqanları bu barədə xəbərdarlıq etməyə və hətta maliyyə alətinin ticarətini qadağan etməyə başladılar. İkili opsionlarla ticarət edərkən seçmək çox riskli bir investisiya fürsətidir. Yatırdığınız bütün pullarınızı itirə biləcəyinizi unutmayın!
(Risk xəbərdarlığı: Kapitalınız risk altında ola bilər)
YouTube-da Ən Son Ticarət Videoları

![Pocket Option Təlimatı [ TAM TİCARƏT BİLDİRİMİ ] 📈 Başlayanlar üçün ondan necə düzgün istifadə etmək olar](jpg/mqdefault-12.jpg)


- Beynəlxalq müştəriləri qəbul edir
- Yüksək ödənişlər 95%+
- Peşəkar platforma
- Sürətli depozitlər
- Sosial Ticarət
- Pulsuz bonuslar
(Risk xəbərdarlığı: Ticarət riski ehtiva edir)
Ticarət icmamızın rəyləri
Jordan Peters
İkili seçim treyderi
Əla müqayisə saytı. Binaryaoptions.com mənə investisiyalarım üçün ən yaxşı ikili brokeri göstərdi. İndi köhnə brokerimlə müqayisədə 20% daha yüksək gəlirlə ticarət edirəm.
Andrea Valbet
Binary Options investoru
Bu veb saytdakı gözəl məlumat üçün təşəkkür edirik! Mən sizin sayənizdə ticarət strategiyalarımı təkmilləşdirdim.
Con Mueller
İkili seçim treyderi