Grafik adalah salah satu alat paling menonjol dan berharga yang digunakan oleh pedagang dalam perdagangan opsi biner untuk memprediksi pergerakan harga di masa depan berdasarkan tren historis. Analisis teknis adalah nama yang diberikan untuk jenis analisis ini, dan karena penggunaannya yang luas, sebagian besar platform perdagangan mencakup berbagai alat analisis teknis.
Pilihan biner, secara umum, adalah investasi jangka pendek yang menuntut studi dan analisis teknis. Akibatnya, memahami dan menganalisis grafik opsi biner sangat penting untuk kinerja pedagang mana pun. Akan sulit untuk mendapatkan keuntungan tanpa pemahaman menyeluruh tentang pembacaan grafik dan analisis teknis. Grafik perdagangan ini tidak harus menakutkan, dan memahami bagaimana menggunakan grafik untuk menguntungkan seluruh strategi perdagangan Anda dan dapat membantu Anda menjadi pedagang yang sukses.

Analisis Teknis dan Fundamental adalah dua bidang studi utama dalam analisis keuangan. Terlepas dari apakah yang satu lebih menguntungkan daripada yang lain, keduanya memiliki satu elemen yang sama: grafik. Analis fundamental, di sisi lain, menggunakan grafik lebih sedikit daripada analis teknis, dan tanpa grafik, setiap pedagang tetap tidak mengerti.
Namun, grafik Binary Options tampaknya menjadi perhatian broker yang paling kecil, dan yang mereka berikan kepada kita hanyalah perangkat lunak charting yang buruk dan tidak efektif.
Jenis grafik
Apa yang akan Anda baca di Posting ini
Harga aset direpresentasikan di atas kertas yang dicetak oleh mesin ticker-tape pada hari-hari awal perdagangan, dan investor membaca rekaman itu untuk mengetahui arah pasar; jika mereka menginginkan bagan, mereka harus mendesainnya sendiri. Metode perdagangan ini dikenal sebagai “pembacaan kaset.” Namun seiring kemajuan teknologi, begitu pula perdagangan, grafik terkomputerisasi muncul. Orang-orang mulai menyadari bahwa harga membentuk pola dan pola grafik dapat diprediksi saat ini terjadi.
Mari kita lihat lebih dekat ketiga jenis grafik:
#1 Bar chart atau OHLC

Grafik OHLC adalah bentuk grafik batang yang menampilkan harga pembukaan, tertinggi, terendah, dan penutupan setiap periode. Bagan OHLC sangat berharga karena menampilkan empat titik data utama sepanjang waktu, dengan banyak pedagang menganggap harga penutupan sebagai yang paling relevan.
Format grafik ini sangat membantu karena dapat menggambarkan momentum naik dan turun. Jika pembukaan dan penutupan berjauhan, itu menunjukkan momentum yang kuat, sedangkan ketika mereka berdekatan, ini menunjukkan momentum yang lemah. Titik tinggi dan rendah mewakili seluruh rentang harga pada periode tersebut, yang berguna untuk menentukan fluktuasi. Pada grafik OHLC, pedagang mencari beberapa pola.
Jendela waktu apa pun dapat digunakan dengan grafik OHLC. Ketika ditambahkan ke grafik 5 menit, harga pembukaan, tertinggi, terendah, dan penutupan untuk setiap periode 5 menit akan ditampilkan. Ini akan menampilkan harga pembukaan, tertinggi, terendah, dan penutupan setiap hari setelah Anda menerapkannya ke grafik harian.
Grafik Lilin #2
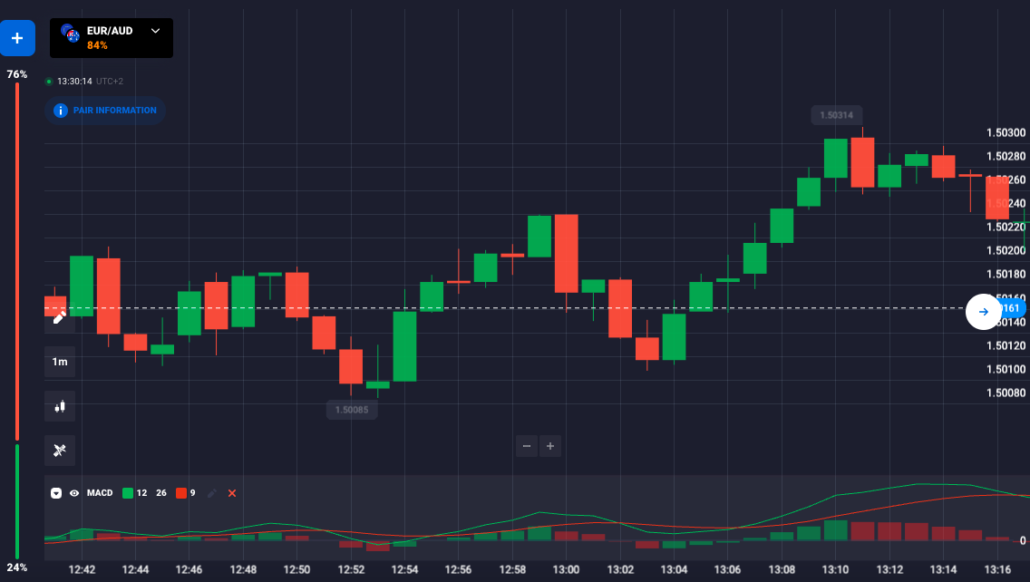
Salah satu jenis grafik yang paling populer adalah Lilin Jepang. Grafik menyajikan sejumlah besar data dalam bentuk yang sangat grafis, memungkinkan pedagang melihat kemungkinan sinyal atau pola perdagangan dengan cepat. Banyak trader pemula yang baru mengenal sektor trading fokus pada candlestick karena mudah dipahami dan memberikan kesan trading sebenarnya. Namun benar juga bahwa tidak ada orang yang menghasilkan uang hanya dengan berdagang pola kandil.
Banyak trader pemula sangat senang karena mereka mendapatkan keuntungan fantastis menggunakan pola candlestick tanpa menghabiskan banyak waktu membaca tentang trading pada awalnya. Namun, mereka akhirnya gagal dan kembali untuk belajar lebih banyak.
Candlesticks adalah bentuk bagan yang menampilkan harga aset pada titik tertinggi, terendah, pembukaan, dan penutupan, dll., dan dengan cepat menunjukkan apakah aset berakhir lebih tinggi atau lebih rendah selama periode tertentu dengan menawarkan pasar yang sangat sederhana dan jelas. analisis.
Tempat lilin memiliki sejarah yang panjang dan kaya sejak pasar beras abad pertengahan di Jepang kuno yang dikuasai Samurai. Anda dapat menggunakannya untuk semua rentang waktu – dari grafik satu menit hingga grafik mingguan dan tahunan. Ketika data disajikan dengan cara ini, biasanya lebih mudah untuk melakukan analisis dan indikasi perdagangan spot dibandingkan dengan jenis grafik lainnya.
Bagan garis #3

Ini adalah jenis grafik paling dasar, yang menggambarkan perubahan harga sebagai garis horizontal. Itu tidak memberikan informasi yang akurat mengenai buka, tutup, tinggi, atau rendah, dan itu tidak menggambarkan apa yang terjadi selama periode waktu tertentu. Misalnya, jika Anda menggunakan grafik candlestick satu jam atau grafik OHLC, Anda dapat melihat bagaimana harga berubah selama setiap jam, sedangkan grafik Garis tidak.. Sayangnya, ini adalah bagan Opsi Biner yang paling umum, dan sebagian besar broker menggunakannya untuk menampilkan kutipan kepada kami.
(Peringatan risiko: Modal Anda bisa berisiko)
Sumber Bagan yang Tersedia
Ada dua jenis sumber grafik:
#1 Bagan yang Dapat Diunduh
Bagan ini dapat diunduh sebagai elemen platform perdagangan valas atau sebagai plug-in perangkat lunak yang berdiri sendiri, seperti namanya. Mereka adalah yang terbaik untuk analisis aset dalam perdagangan opsi biner karena mereka menyertakan banyak alat yang meningkatkan hasil analisis. Untuk analisis opsi biner, mereka adalah program grafik yang disarankan.
Beberapa sumber bagan menyediakan alat bagan mereka yang tersedia secara gratis. Beberapa gratis tetapi memerlukan plug-in yang dibeli untuk berfungsi, dan lainnya yang datang sebagai bagian dari paket komprehensif yang harus dibayar penuh. Berikut ini adalah beberapa sumber charting untuk grafik forex yang dapat diunduh yang digunakan dalam analisis opsi biner:
- Grafik MetaTrader4
Platform ini dapat diakses melalui hampir setiap broker pembuat pasar di pasar FX. Ada beberapa yang layak disebutkan karena mereka memiliki basis aset yang lebih beragam yang melengkapi indeks aset opsi biner.
Platform MetaTrader4 mungkin merupakan sumber terbaik untuk data charting gratis dan live chart.
Anda sebaiknya unduh platform MT4 dari broker yang menawarkan lebih dari 40 pasangan mata uang, semua indeks saham utama (atau setidaknya delapan), logam spot, dan saham.
- MultiCharts

Bekerja sama dengan TradingView, Multicharts adalah paket pembuatan grafik yang memungkinkan Anda mengunduh grafik FX definisi tinggi untuk 30 pasangan mata uang yang berbeda. Versi grafik berbasis web juga tersedia. Anda dapat memilih dari berbagai kerangka waktu mulai dari satu menit hingga satu bulan.
Platform grafik dan perdagangan MultiChart, yang dibuat oleh MCFX, adalah paket andal yang mencakup fungsi perdagangan grafik ODM khusus. Bagan ini membantu Anda dengan memberikan harga aset aktual yang ingin Anda perdagangkan, memberi label, dan menggunakan data ini untuk memberi tahu Anda tentang perdagangan ketika memiliki jeda waktu baik dalam operasi perdagangan dan pembuatan sinyal.
- Sistem Informasi Pialang Interaktif (IBIS)

Istilah "interaktif" dalam nama broker ini menjelaskan semuanya. Pialang Interaktif menyediakan salah satu sistem grafik analisis teknis terlengkap. Teknologi Sistem Informasi Pialang Interaktif memungkinkan pembuatan bagan pada tingkat yang terorganisir. Fitur pembuatan grafik IBIS meliputi:
- 22 indikator teknis yang dapat disesuaikan.
- Alat peringatan yang memungkinkan Anda membuat peringatan.
- Kemampuan untuk memanfaatkan salah satu dari tiga gaya grafik (grafik batang, kandil, atau grafik garis).
Namun, bundel ini tidak gratis. Anda harus membayar biaya berlangganan bulanan sebesar $69 untuk mengaksesnya.
- Widget Grafik Forex v1.7

Chris Craig merancang Widget Grafik Forex v1.7. Anda dapat mengunduhnya secara gratis dari Softpedia. Ini adalah sistem grafik yang dapat diunduh yang membantu pengguna untuk memeriksa grafik mata uang untuk beberapa pasangan. Pengguna akan dapat memilih periode waktu dan menggunakan serangkaian indikator yang disertakan dalam plug-in.
Grafik Online #2
Grafik ini sebagian besar berbasis web yang dapat diakses melalui situs web beberapa penyedia perangkat lunak dan broker. Dalam hal interaksi dan alat yang diperlukan untuk menggunakannya, bagan ini tidak memberikan banyak keserbagunaan. Anda tidak disarankan menggunakan grafik internet untuk perdagangan opsi biner.
Berikut ini adalah beberapa sumber grafik untuk grafik berbasis online yang digunakan dalam analisis opsi biner:
- Dasbor FX saya (oleh OFX)

Alat grafik biner OFX memungkinkan pedagang untuk melakukan studi garis, menggunakan indikator, dan banyak lagi. Program ini adalah aplikasi internet Java-enabled yang memungkinkan pengguna untuk berpindah antara grafik sederhana dan canggih. Perangkat lunak pembuatan grafik ini ditulis dalam EasyLanguage, bahasa pemrograman yang sama yang menggerakkan platform perdagangan TradeStation FXCM. Dengan demikian dapat digunakan sebagai perangkat lunak plug-in on Platform perdagangan utama FXCM.
- FreeBinaryOptionsCharts.com

Situs web ini menyediakan bagan opsi biner gratis dan sederhana. Mereka juga menawarkan panduan pemula yang fantastis tentang penggunaan grafik biner. Artikel-artikel strategi yang ditawarkan berkualitas sangat tinggi, karena ini adalah Situs Mifune.
Bagaimana cara membaca grafik Opsi Biner?
#1 Penting
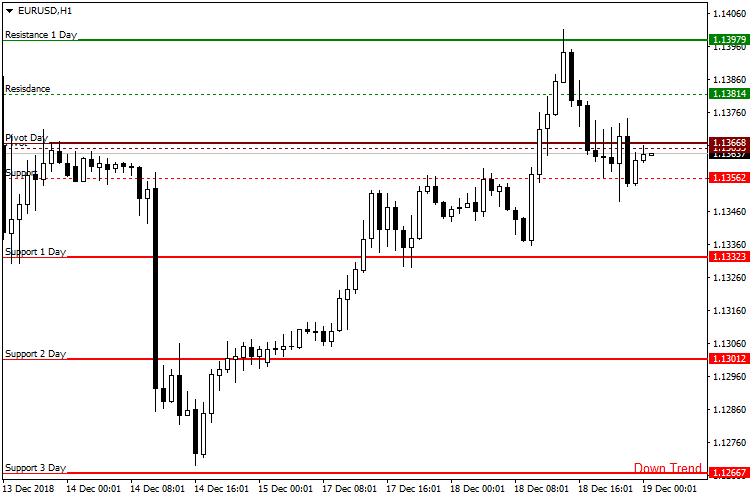
Jika kamu memperdagangkan opsi biner pada EUR/USD, Anda harus membuka grafik dan menggunakan alat untuk membantu Anda membuat pilihan perdagangan yang lebih cerdas. Masukkan simbol atau nama aset untuk melihat bagaimana harga berjalan sekarang dan di masa lalu jika Anda memperdagangkan aset opsi biner.

(Peringatan risiko: Modal Anda bisa berisiko)
#2 Pilih aset
Di kotak kiri atas, ketik nama atau simbol aset yang Anda perdagangkan.
Dan segera setelah Anda mulai mengetik, daftar dropdown ditampilkan, membuatnya sangat mudah untuk menemukan aset yang Anda inginkan.

#3 Pilih jangka waktu
Menu pull-down terletak di sebelah kotak simbol. Opsi ini disetel ke "Harian" secara default yang akan menampilkan riwayat harga harian aset Anda. Setiap batang mewakili satu hari, menjadikannya periode waktu yang berguna untuk menentukan tren harga keseluruhan aset.

Anda juga ingin melihat bagaimana harga aset berperilaku selama jangka waktu singkat jika Anda melakukan perdagangan harian atau memperdagangkan opsi biner jangka pendek. Anda dapat memperbesar untuk memeriksa bagaimana harga berperilaku saat ini dengan memilih jangka waktu yang lebih pendek, seperti menit, 5 menit, atau 15 menit tampilan.
Setiap batang pada grafik akan menampilkan data harga 5 menit jika Anda memilih “5 Menit”.
#4 Alat untuk membandingkan
Jika Anda ingin membandingkan dua atau lebih aset, alat Bandingkan sangat ideal. Saat Anda memeriksa pola grafik aset yang berbeda, Anda akan melihat mana yang lebih lemah dan mana yang lebih kuat, yang akan memandu Anda untuk memilih aset mana yang akan dibeli, dimasukkan, atau dipanggil.

Setelah memilih “Bandingkan”, masukkan simbol yang ingin Anda bandingkan dengan aset yang saat ini ditampilkan di bagan.
Karena aset memiliki berbagai nilai, skala di sebelah kanan mewakili persentase dan bukan nilai dolar. Anda dapat menggunakan skala % untuk melihat apakah aset berperforma lebih baik atau lebih buruk dalam hal persentase perubahan.
Jika Anda tidak menyukai skala %, batalkan pilihannya dari opsi "Tampilkan Skala Persentase" pada alat Bandingkan. Kembali ke Perbandingan dan batalkan pilihan atau hapus aset dari daftar perbandingan Anda untuk berhenti membandingkan.
#5 Indikator teknis
Anda hanya perlu memilih “Indikator Teknis” dari menu tarik-turun yang muncul, dan indikator akan ditambahkan ke bagan Anda saat Anda memilihnya. Setiap indikator sepenuhnya dapat dikonfigurasi. Dalam kebanyakan kasus, Anda akan memilih untuk menambahkan indikator ke riwayat harga, jadi ketika ditanya di mana Anda ingin menerapkannya, pilih "Riwayat Harga."

Semua indikator yang Anda tambahkan akan ditampilkan di akhir grafik harga atau di data harga. Untuk mempersonalisasi indikator, pilih "Edit" dari panah kecil di samping nama indikator.
#6 Memperbesar atau memperkecil
Dengan menyeret penggeser abu-abu di bagian bawah bagan ke kanan atau kiri, Anda dapat memperbesar dan memperkecil dengan cepat kerangka waktu yang Anda amati. Anda juga dapat menggunakan bilah geser ini untuk kembali ke riwayat dan memperbesar pada hari tertentu di masa lalu.

Anda cukup mengubah keseluruhan periode waktu dengan mengetuk salah satu dasar abu-abu di bagian bawah, seperti 1H (1 hari), 6M (6 bulan), 1Y (1 tahun), atau YTD (tahun-ke-tanggal).
Pengaturan #7
Terakhir, klik "Bagan" di kanan atas untuk mengubah konfigurasi umum. Kecuali untuk pengaturan pertama, yang harus Anda ubah berdasarkan selera pribadi Anda, Anda tidak perlu repot dengan pengaturan lainnya.

Candlestick adalah pengaturan default untuk "Gaya Harga". Bagi banyak pedagang, grafik candlestick adalah jenis grafik yang disukai. Anda juga dapat memilih dari OHLC (BukaTinggiRendahTutup) bagan, Bagan Garis, dan Bagan batang jika Anda menginginkan gaya bagan yang berbeda. Semua grafik ini memberikan riwayat harga, tetapi mereka melakukannya dengan cara grafik yang berbeda, dan beberapa menyertakan lebih banyak data daripada yang lain.
Kesimpulan: Grafik memungkinkan cara perdagangan yang lebih strategis
Sementara grafik opsi biner mungkin sangat bermanfaat dalam membangun peluang masuk bagi pedagang opsi biner dan memberikan wawasan penting tentang kinerja aset masa lalu, mereka harus dipahami secara menyeluruh sebelum dapat digunakan secara efektif. Penting juga untuk tidak membiarkan emosi Anda mendapatkan yang terbaik dari apa yang dikatakan grafik kepada Anda. Jangan biarkan emosi Anda meyakinkan Anda bahwa tren negatif besar dalam rata-rata bergerak tidak signifikan, seperti salib ke bawah. Sebagai seorang trader, Anda harus memperhatikan indikator karena mereka menceritakan sejarah.
Jika dilakukan dengan benar, pembuatan bagan mungkin cukup menguntungkan, tetapi Anda harus terlebih dahulu mendidik diri sendiri dan memilih pola dan indikator teknis yang ingin Anda gunakan dalam pendekatan perdagangan Anda. Ada beberapa jawaban 'benar dan salah' begitu sampai pada grafik karena setiap teknik perdagangan sama uniknya dengan orang yang menggunakannya. Akun demo adalah kesempatan bagus untuk bereksperimen dengan berbagai strategi perdagangan dan melihat apa yang cocok untuk Anda.


